Split jerk CrossFit is the most effective method to move the maximum amount of weight from your rack for jerks position (shoulders) and then your overhead. In order to be able to move the greatest weight, this move requires a huge amount of strength and precision. When training the split jerk could be used to improve speed, power precision, mobility as well as overhead power. To ensure that you’re reaping all these benefits from this exercise it is essential to do it right which is why we’ll dissect it into smaller pieces.
How To Do Split Jerk – Step-By-Step
Step 1: Determine Which Foot Should be Split in the Direction of Forwarding
Before you begin learning for the split-jerk it is important to determine your split jerk’s foot position – also known as that of the receiver position. For this first, you must determine the foot that should be facing towards the front. This can be done by asking a person to provide you with gentle pressure on your back. Whatever foot you try to get yourself to catch can be considered your foot forward. Simple!
Step 2: Get Perfect Your Steps
The next step involves creating an extensive and long base of support to aid in stabilizing the weight.
If you are splitting your feet, your front foot and the back foot must travel in the respective directions about identical distances. Also, you need to divide your feet equally back and forward. It is possible to have more weight on your front foot, hence the weight should be evenly distributed between your feet.
It’s crucial to maintain the following in mind:
- The front shin is vertical.
- A little bit higher in the back.
- The back knee is slightly bent.
Your hips should lie directly beneath your shoulders and the bar should be straight over your head.
Step 3: Start the Split Jerk
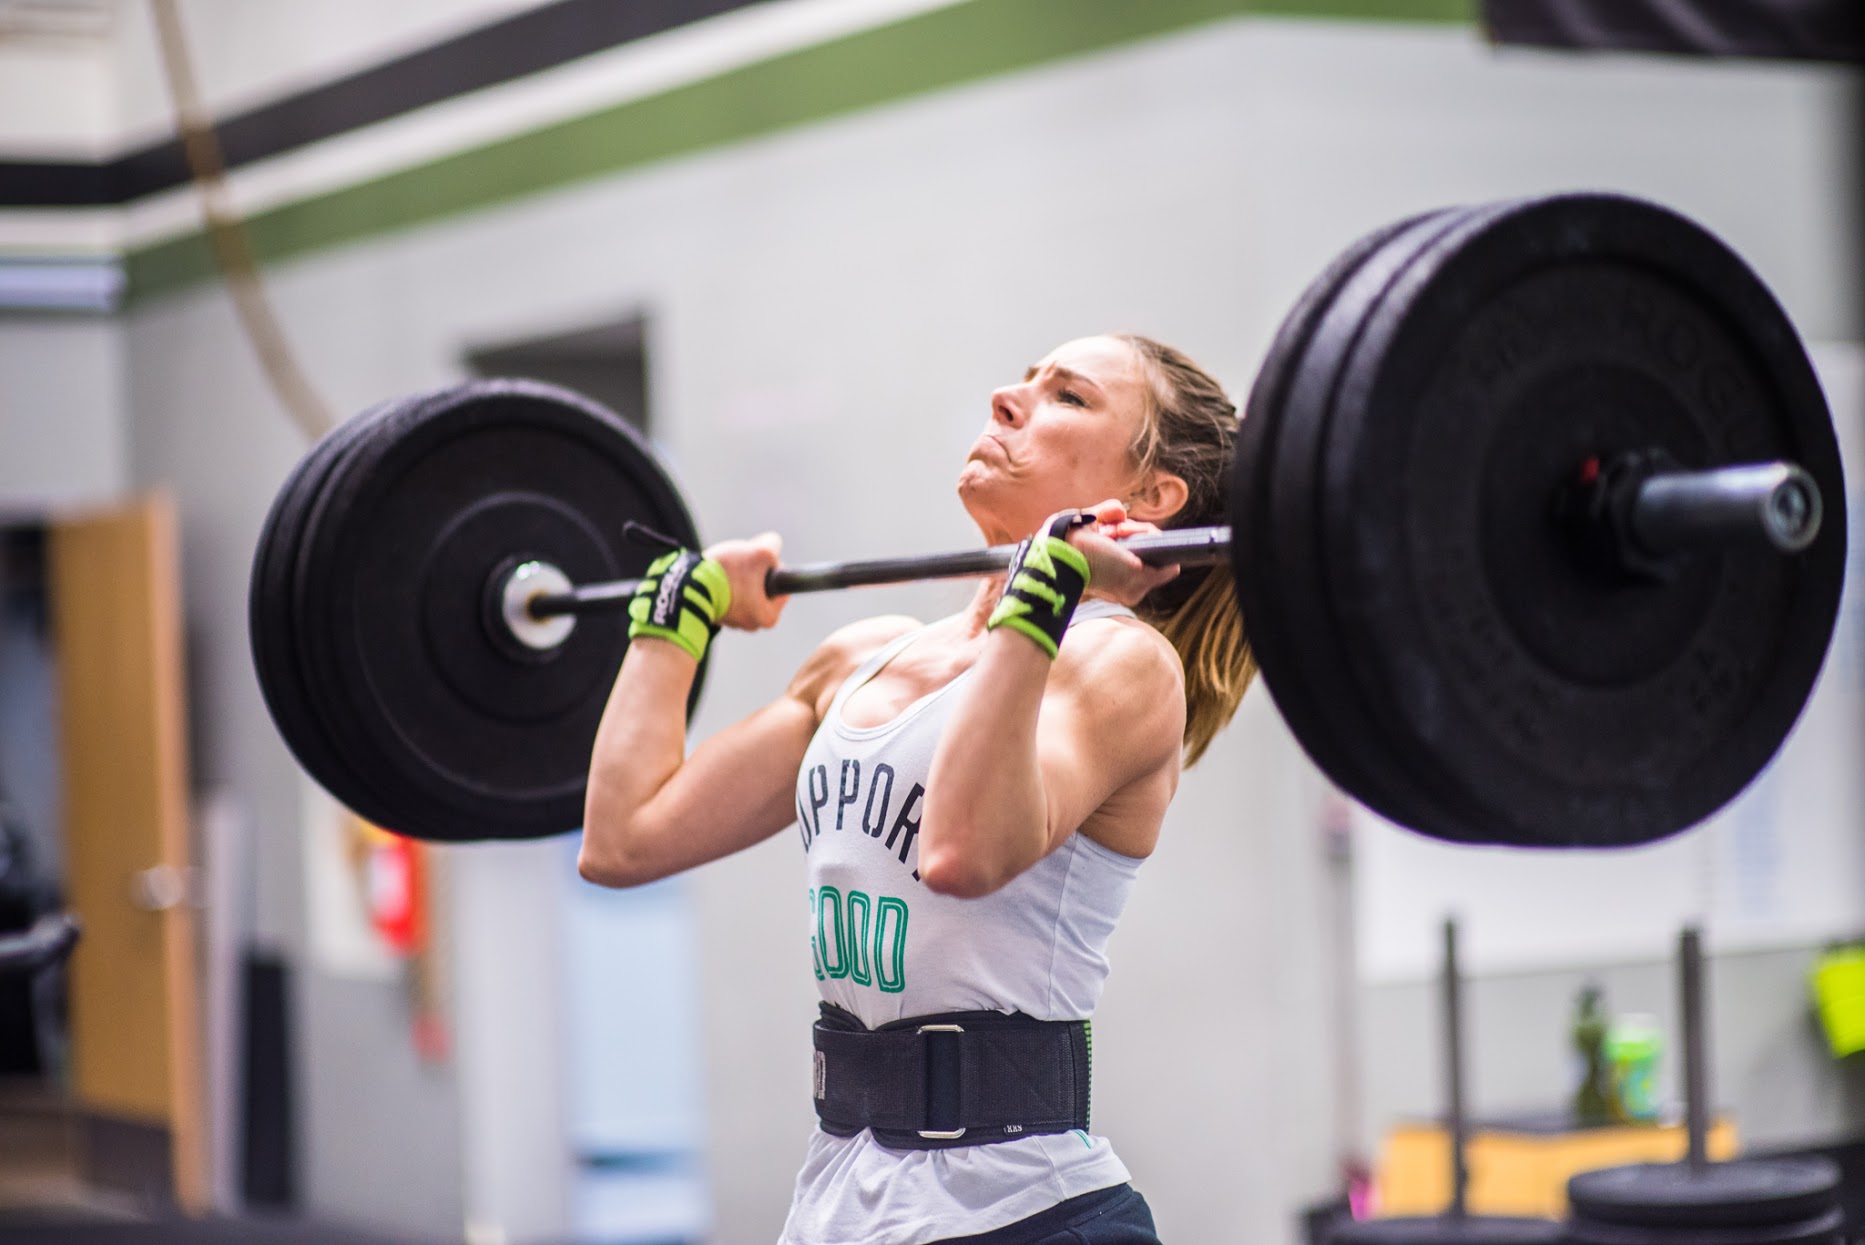
When you’re doing the jerk out of an exercise rack or after a clean, it is important that it is essential to begin the move by getting into a sturdy front rack position. To make a solid jerk rack, imagine creating a “W” using your elbows, then lowering the bar and spreading them out towards the sides. The optimal elbow position is lower than the rear position rack but not completely below the bar.
The lower your elbows drop (without dropping straight down) and the more efficient your body mechanics will be you push your body beneath the bar. By spreading your elbows, you create the strongest position for you to pull the bar upwards.
Points Of Performance
- Place your feet on the floor with your hips spaced
- Place hands on the shoulders of both sides
- Shoulders elbows slightly ahead of the bar.
- Keep the bar in your full grasp
- Torso dips straight down
- The hips and legs extend rapidly and then they press down
- The bar should be held in an upward position
- The heels remain on until the hips and legs are extended.
- Begin by bringing feet together taking one step at a
- Complete When both feet are in a single position with the full hip, knee, and arm extension
How To Increase the Split Jerk Technique
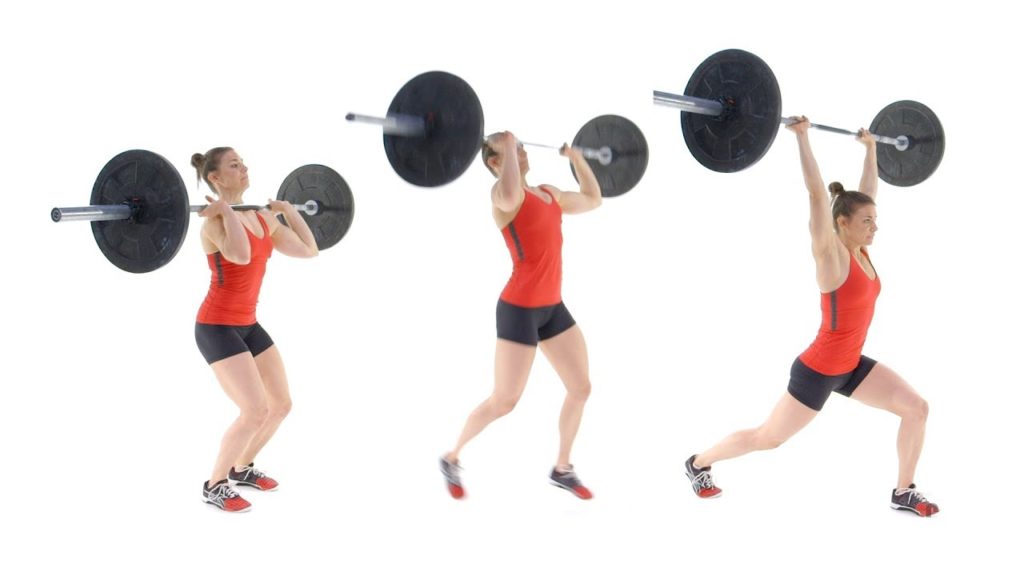
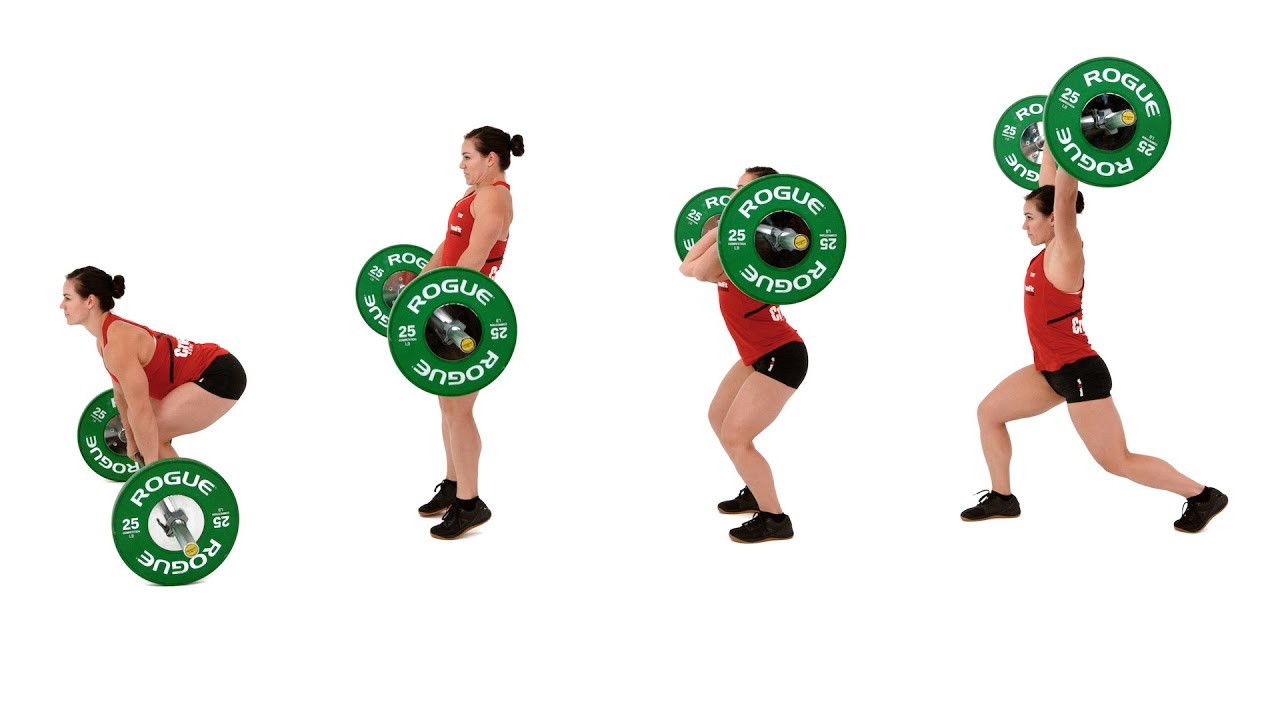
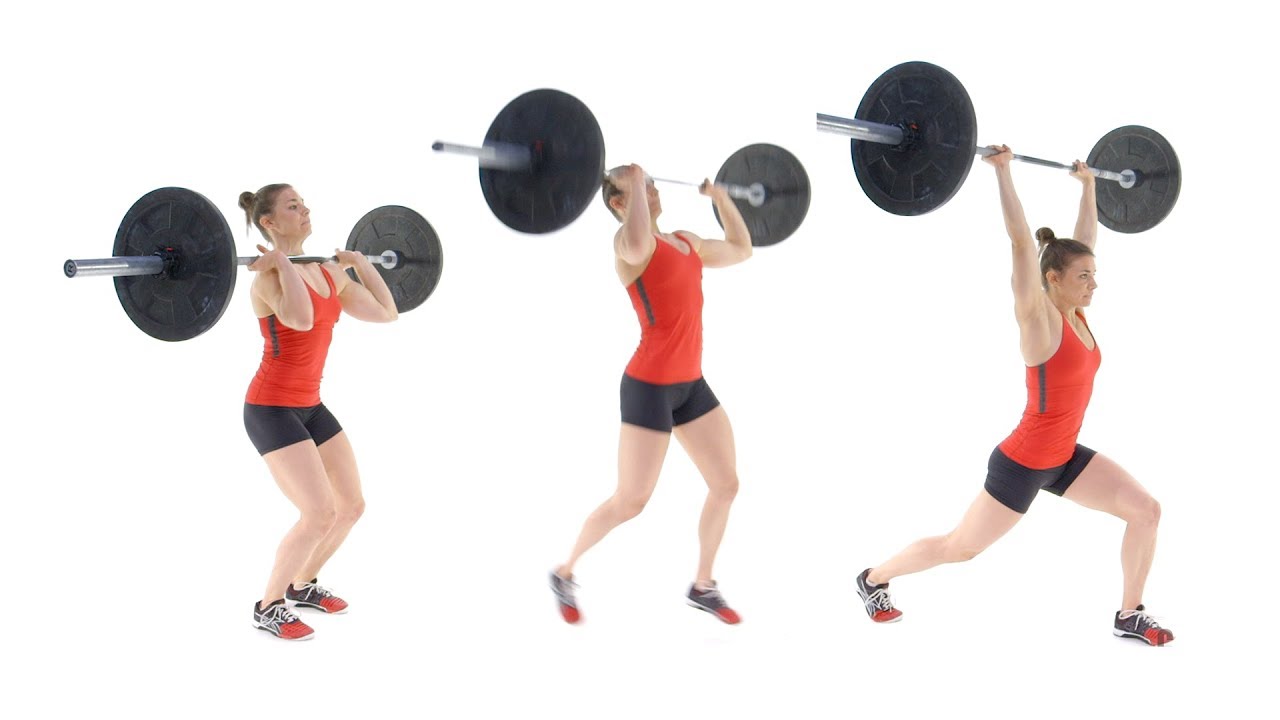
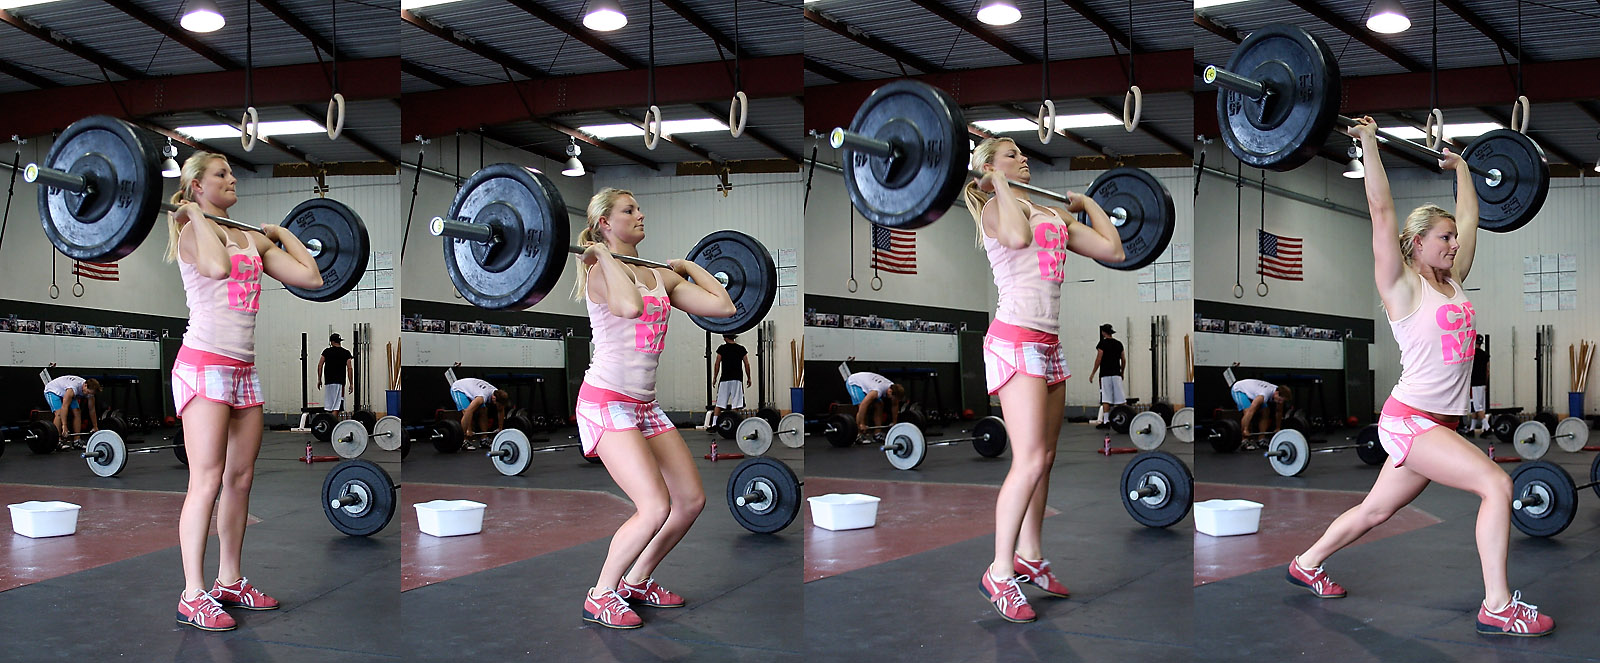
Because both Olympic Lifts require the barbell to be moved across the room from the lower to the overhead position We will have to include something in the Clean to lift the barbell out of the shoulders into the overhead position and then we can reach the second portion of the Clean and Jerk – the Jerk Split as demonstrated by CrossFit Seminar staff participant Julie Foucher.
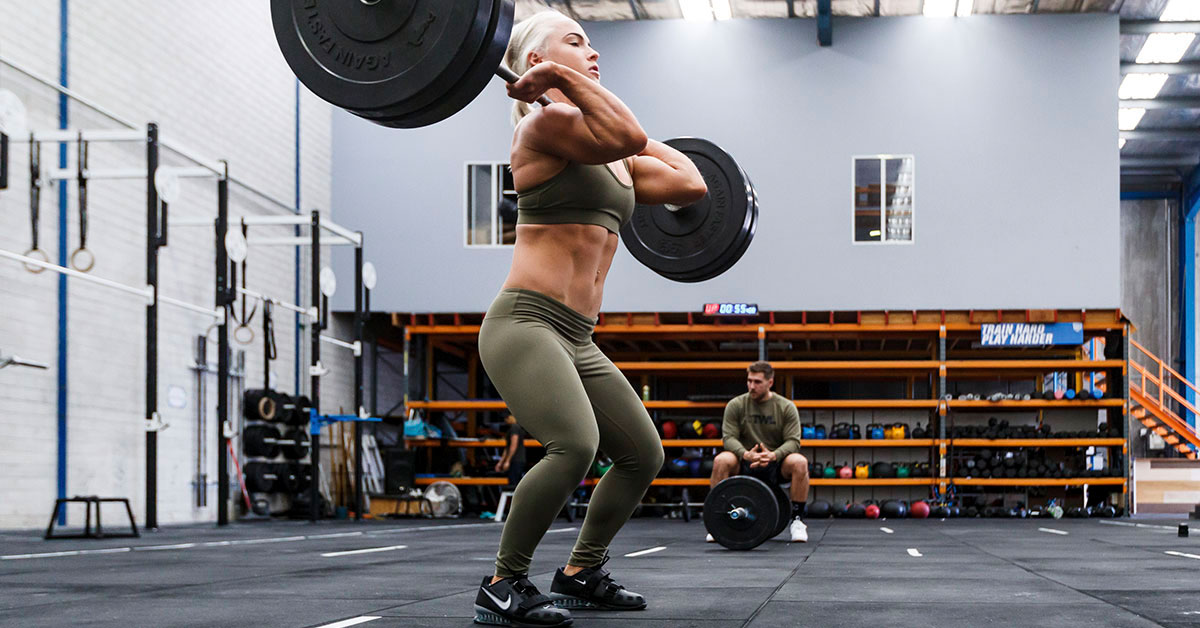
This Split is very similar to the Push Jerk we looked at this week, but it increases the depth we are able to drop (and therefore the weight we are able to lift) however, we divide the legs into the lunge position heels stay.
To safeguard your knees and hips, ensure that you are kept right standing position and that the back foot needs to be slightly tilted to the side.
1. Body Positioning: Split Jerk – Not Split Splat!
If someone attempts to jerk split the first time it’s typically a one-foot splat, however, it must be exact. As a trainer, from the side, I will look for an even smooth line that runs between your shoulders, bar, and hips, with an equal distance between the feet. This will allow your legs to bear the burden instead of the lower back or joints.
Simple positioning cues like:
- Does the shin of your front leg straight?
- Do you think the back leg is bent?
- Does the back footrest place on its toes and in alignment with your knee?
Apart from the legs ensure that the hips and shoulders are directly under the bar once you have received the weight. This makes it feel lighter.
2. The Perfect Driver That You Drive
The push press is an excellent exercise that will help you improve your drive, however, you should utilize your leg as often as you can, by driving onto your toes, then remain on your toes till at the conclusion of your exercise This may be a bit more difficult but it’ll be worth it! However, if you have good leg power but your bar’s trajectory isn’t quite right Power jerks can be an excellent way to straighten the bar’s path. Many athletes can avoid an unsatisfactory split jerk, but they might be hitting the bar improperly. Using alternating push presses and power jerks can aid in solving the issue naturally.
3. Rack Position
The same idea was discussed in the clean article. Having a comfy shelf that is placed on the bar’s shoulders will let the drive and dip be a straight line and strong.
If you have trouble keeping your elbows or chest up when you dip, you might need to work on improving the thoracic range of motion as well as loosening up your lats or the triceps. It could also be a matter of strength in your postural muscles, and for this, the jerk-dips you do with heavyweight is 3 sets of 5 can help strengthen the posture of the dip. Another common occurrence to be aware of is to alter standing in the proper position that the rack is in by using your arms too early. You must allow your shoulders to drive through the bar prior to letting you can push through.
4. Sound is Crucial
A quiet or “pitter-patter” split is generally a sign that the lifter is too slow or is not providing sufficient float to the bar to allow the feet to slide into the correct position. Then, at the top of the jerk, feet have to move out, as opposed to lifting them up and then out Many individuals are slow due to the fact that they are trying to lift their legs with an arch instead of a skim across the surface. The process of perfecting this is a long time however, you’ll be like the many instances Olympic winner Pyrros Dimas
5. Give Them Time
It is typical to begin to be in a position to push press further than you can do a jerk. The process of adjusting your jerk requires patience, but once you have it perfected, then it will become more snappy and this will enable your carefully crafted split to take on the weight before the weight falls and you’ll be able to hit the bar in victory. If you struggle to stay stable during the split jerk, I would suggest performing some single-leg strength exercises like alternate lunges for the legs and the overhead split squats.
Look also – Squat Snatch CrossFit – Guide, The Best Tips, Benefits
Split Jerks Crossfit F.A.Q.
What’s a split jerk?
What does jerk mean in Crossfit? The lifting of weights up to rack position (clean) and then lifting weights above the head (jerk).
What is split jerk good for?
The primary benefit of transferring the split jerk into the forceful strike is the fact that it aids in building the leg, shoulder, and core strength, and also building “effective mass”.